Welcome to Labkafe ~ Orientallabs Retail Services Private Limited
Jul 23, 2021 / By Soumen Mondal / in Experiments Physics Learning
Aim:
To measure (a) diameter of a small spherical/cylindrical body and (b) to measure internal diameter and depth of a given beaker/calorimeter using Vernier Callipers and (c) hence find its volume
Apparatus:
Theory:
A Vernier Calliper has two scales–one main scale and a Vernier scale. Vernier Scale slides along the main scale. The main scale and Vernier scale are divided into small divisions though of different magnitudes. Generally, each division of Vernier scale is smaller than each division of main scale. In our example nine main scale division is equals to ten vernier divisions.
The main scale is graduated in cm and mm. It has two fixed jaws, A and C, projected at right angles to the scale. The sliding Vernier scale has jaws (B, D) projecting at right angles to it and also the main scale and a metallic strip (N). The zero of main scale and Vernier scale coincide when the jaws are made to touch each other. The jaws (A, B) are used to measure external diameter of an object, Jaws (C, D) are used to measure internal diameter of an object and metallic strip are designed to measure the height / depth of any object. Knob P is used to slide the Vernier scale on the main scale. Screw S is used to fix the Vernier scale at a desired position. The least count of a common scale is 0.1 cm or 1 mm. It is difficult to further subdivide it to improve the least count of the scale. A Vernier scale enables this to be achieved.
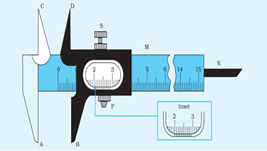
Fig. 1.1
Principle:
Determination of Least Count or Vernier Constant:
The difference in the magnitude of one main scale division (M.S.D.) and one Vernier scale division (V.S.D.) is called the least count of the instrument, as it is the smallest distance that can be measured using the instrument. For an instrument where Vernier is used its Vernier Constant (VC) is its Least Count (LC).
From fig 1.1, 10 division of Vernier scale coincides with 9 division of main scale and the length of 1 division on main scale is 1 mm.
10 Vernier Scale Division (VSD) = 9 Main Scale Division (MSD)
1 VSD = MSD
The quantity (1 MSD – 1 VSD) is called Vernier Constant (VC).
VC = (1 - ) MSD = MSD =
= × 1 mm (1 MSD = 1mm)
VC = 0.1mm = 0.01cm
The volume of the spherical object is:
V = , Where r is the radius of the sphere.
Determination of Zero Error:
If the zero of main scale coincides with zero of Vernier scale when jaws C and D are brought in contact with each other, then the instrument is free from error as shown in fig. 1.2. But in actual practice it is never so. Due to wear and tear of jaws and sometimes due to manufacturing defects the zero mark of the Vernier scale does not coincide with zero of main scale. It gives rise to an error called zero error. Zero error can be positive or negative.

Fig. 1.2
(i) Positive zero error and its correction:
The zero error is positive when the zero mark of the Vernier scale shifted towards the right side of the zero of main scale when jaws C and D are made to touch each other. In such case, measured length will be more than the actual length and, therefore, the zero error is called positive zero error. Hence, we have to subtract positive error from the actual error. If, for example, the 3rd Vernier mark coincides with any main scale reading as shown in the fig 1.3, then the Zero error is:
Zero error = 0.00 + 3 x Least Count = 0.00 + 3 x 0.01
Zero error = 0.03 cm
Hence, the Actual reading = Measured reading – (0.03)

Fig. 1.3
(ii) Negative zero error and its correction:
The zero error is negative when the zero mark of the Vernier scale shifted towards the left side of the zero of main scale when jaws C and D are made to touch each other. In such case, measured length will be less than the actual length and, therefore, the zero error is called negative zero error. Hence, we have to add negative error with the actual error If, for example, the 8th Vernier mark coincides with a main scale reading as shown in the fig 1.4, then the Zero error is:
Zero error = 0.00 - (10-8)** x Least Count = 0.00 - 2 x 0.01
Zero error = -0.02 cm
Hence, the Actual reading = Measured reading – (-0.03)

Fig. 1.4
** to calculate negative error we count the coincide mark from the opposite side which is from 10 to 0 of the Vernier scale.
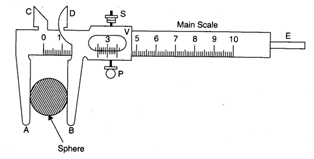
Fig. 1.5
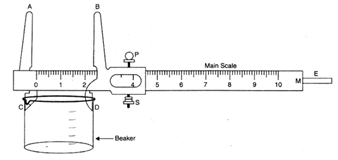
Fig. 1.6
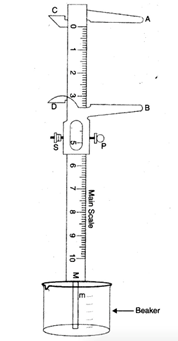
Fig. 1.7
Procedure:
Measurement of diameter of spherical body
Measurement of internal diameter
Measurement of depth.
Observations:
Determination of Vernier constant :
1 smaller div. of the main scale (MSD) = ______mm or ______cm
_____ Vernier division (VSD) = _____MSD
1 VSD = ______ MSD = ______ mm or ______cm
So, VC = 1 MSD -1 VSD = _______ mm or _______cm
Zero error, e = ± _______mm or _______cm
Table 1.1 Measuring the diameter of spherical body
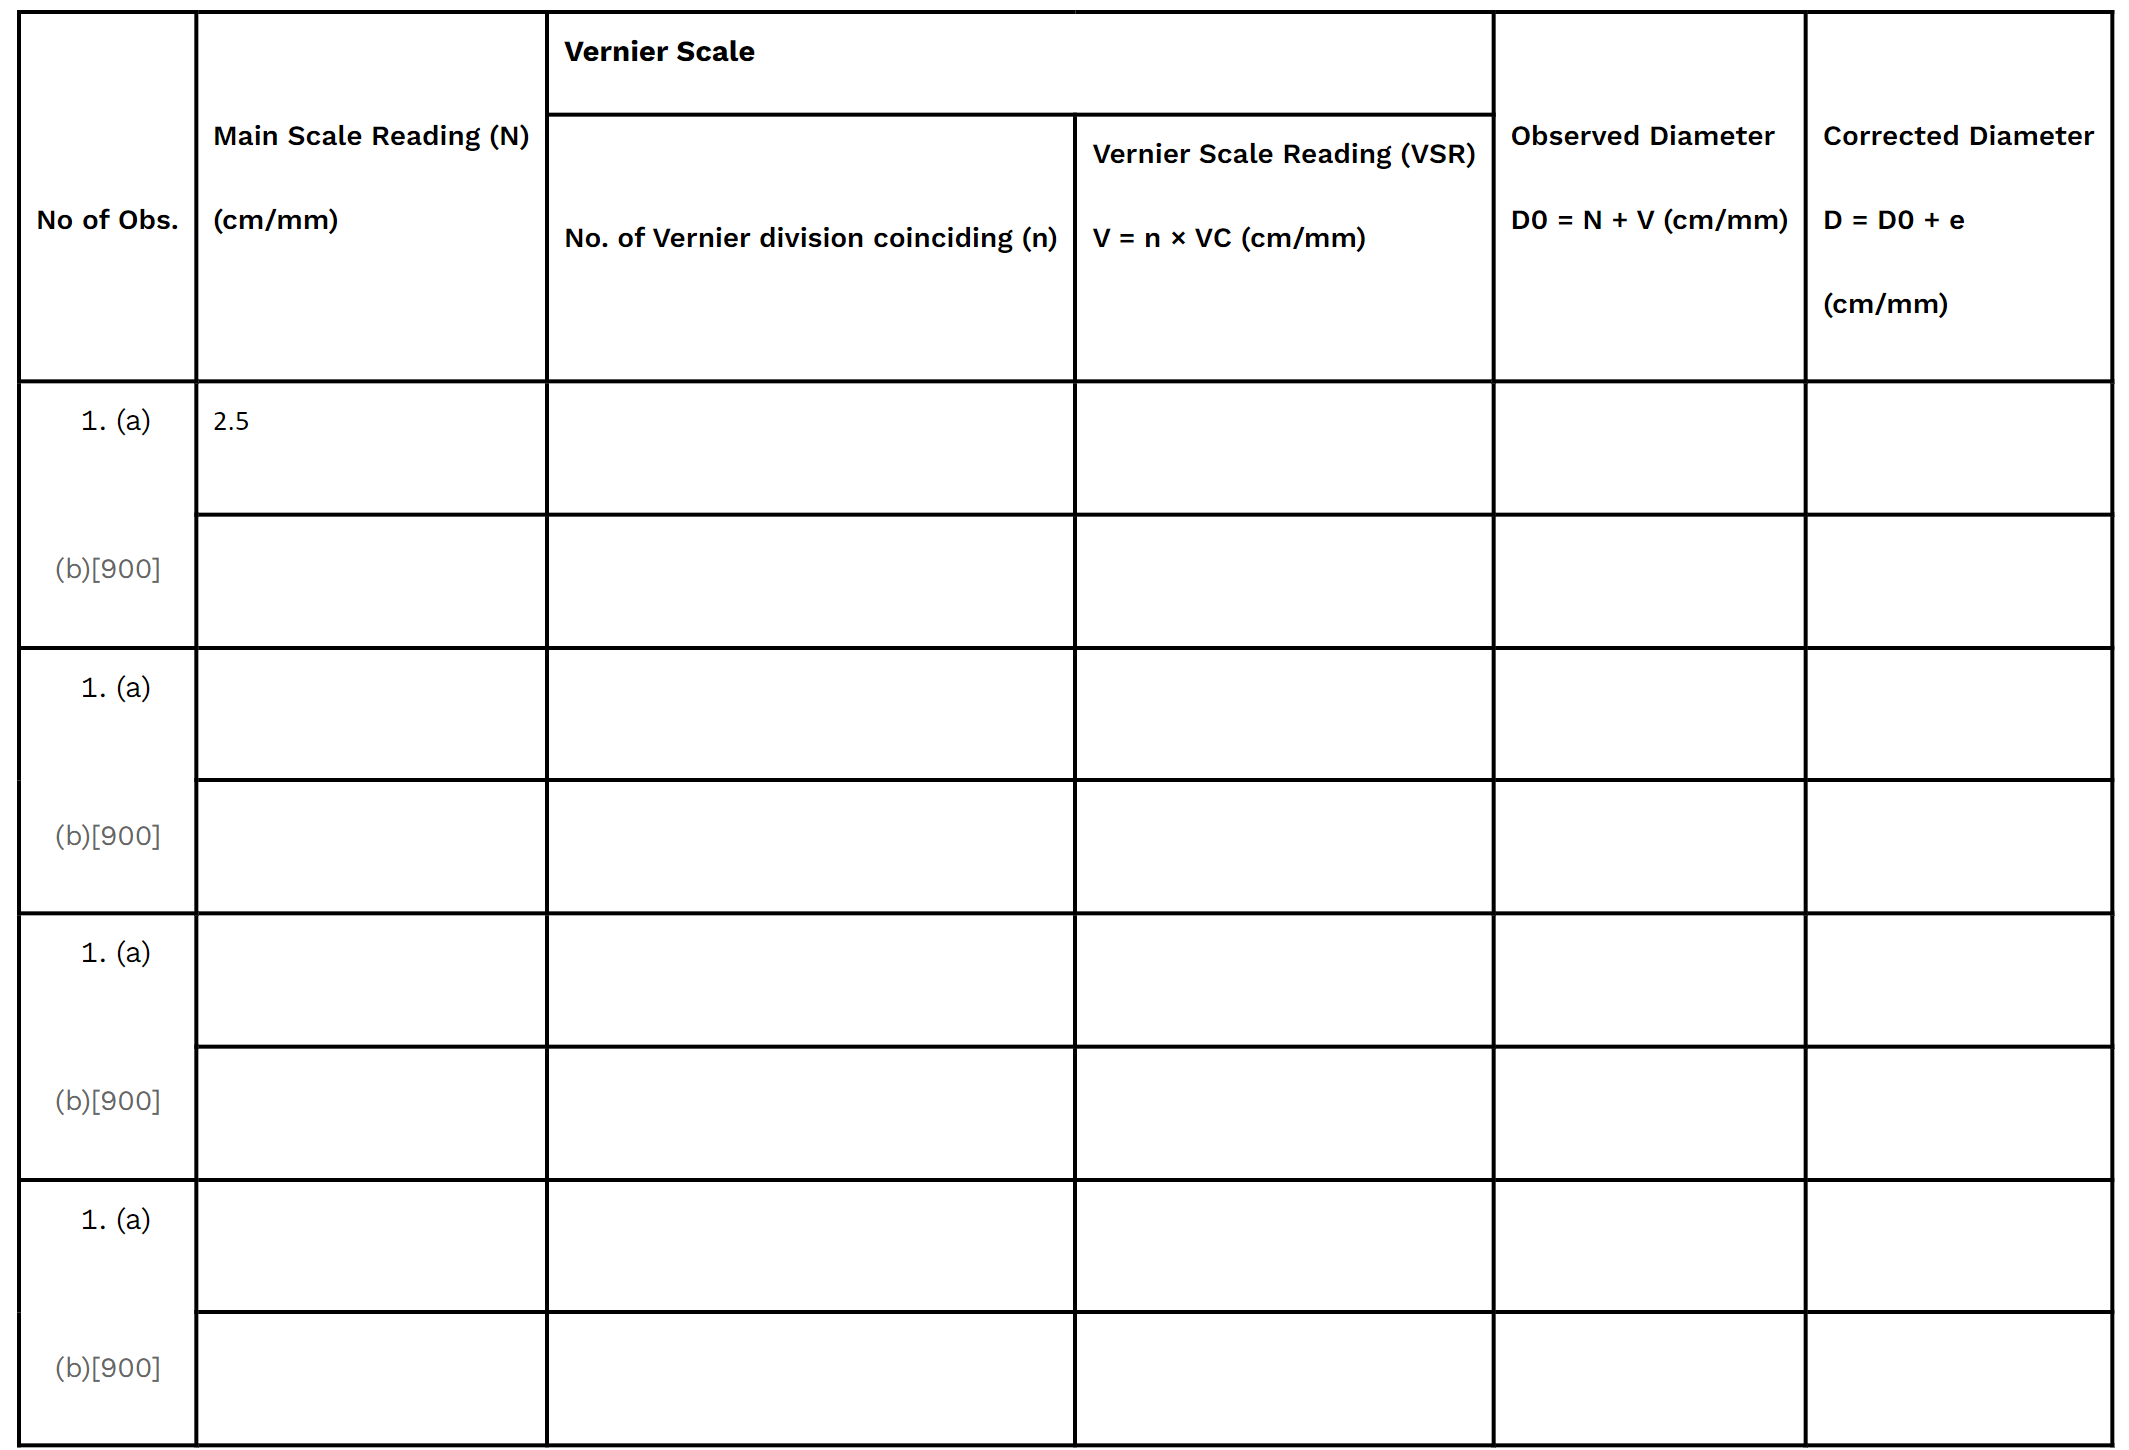
[(a) and (b) corresponds to mutually perpendicular diameters.]
Mean corrected diameter, Ds: __________________(cm/mm)
Table 1.2 Determination of internal diameter of a Beaker/Calorimeter
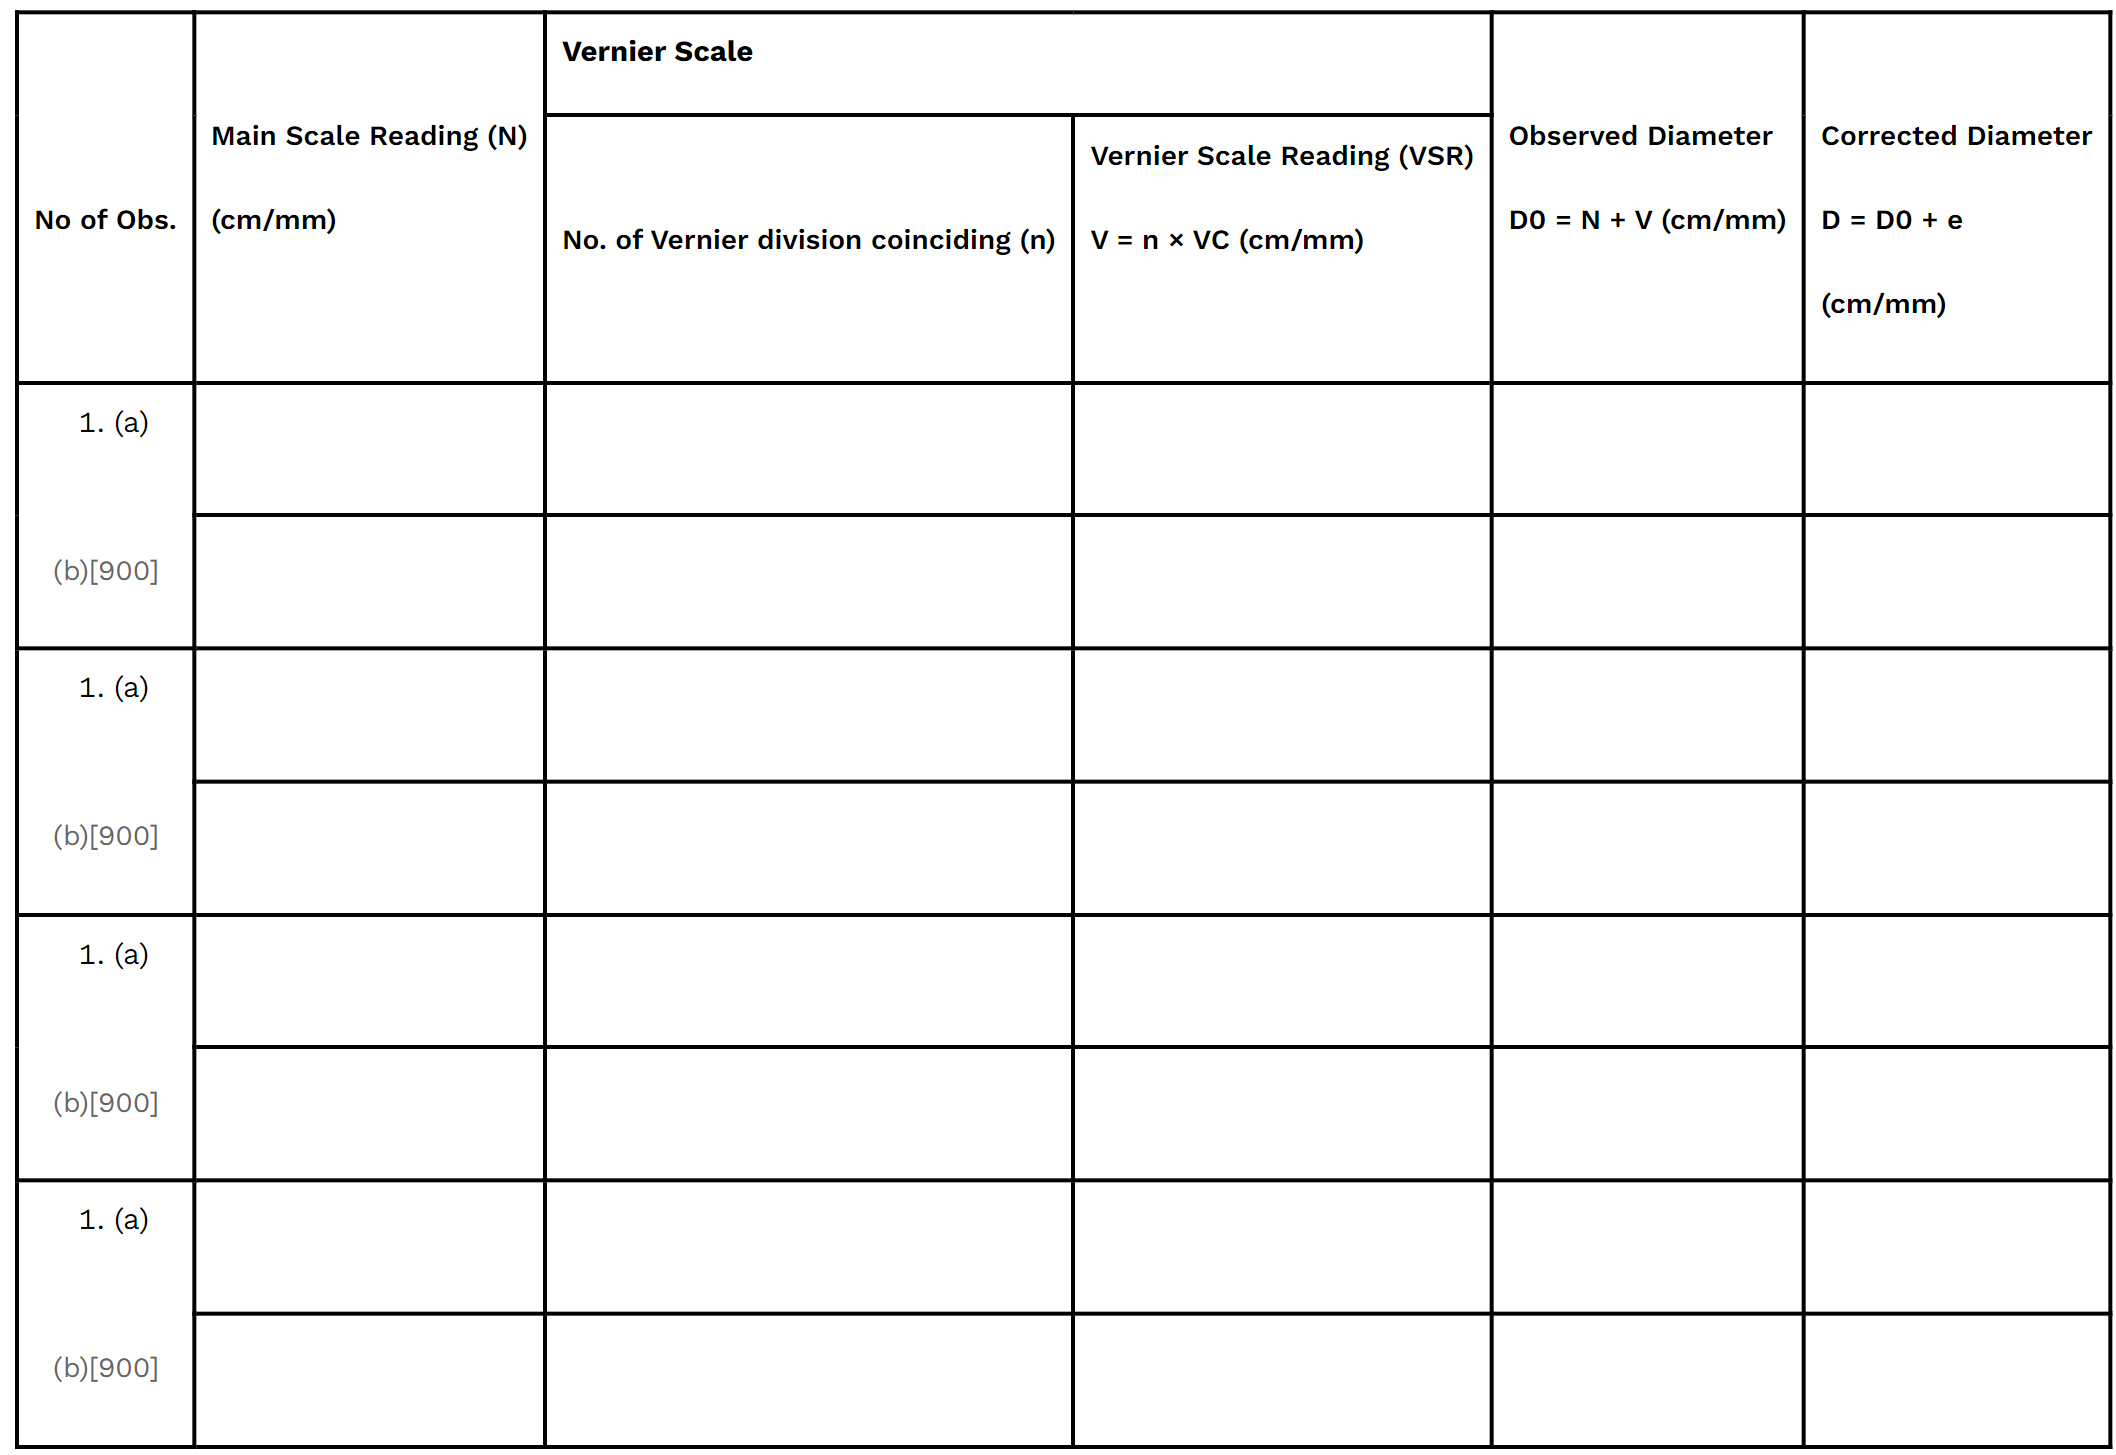
[(a) and (b) corresponds to mutually perpendicular diameters.]
Mean corrected diameter of beaker, DB: _________________(cm/mm)
Table 1.2 Determination of depth a Beaker/Calorimeter
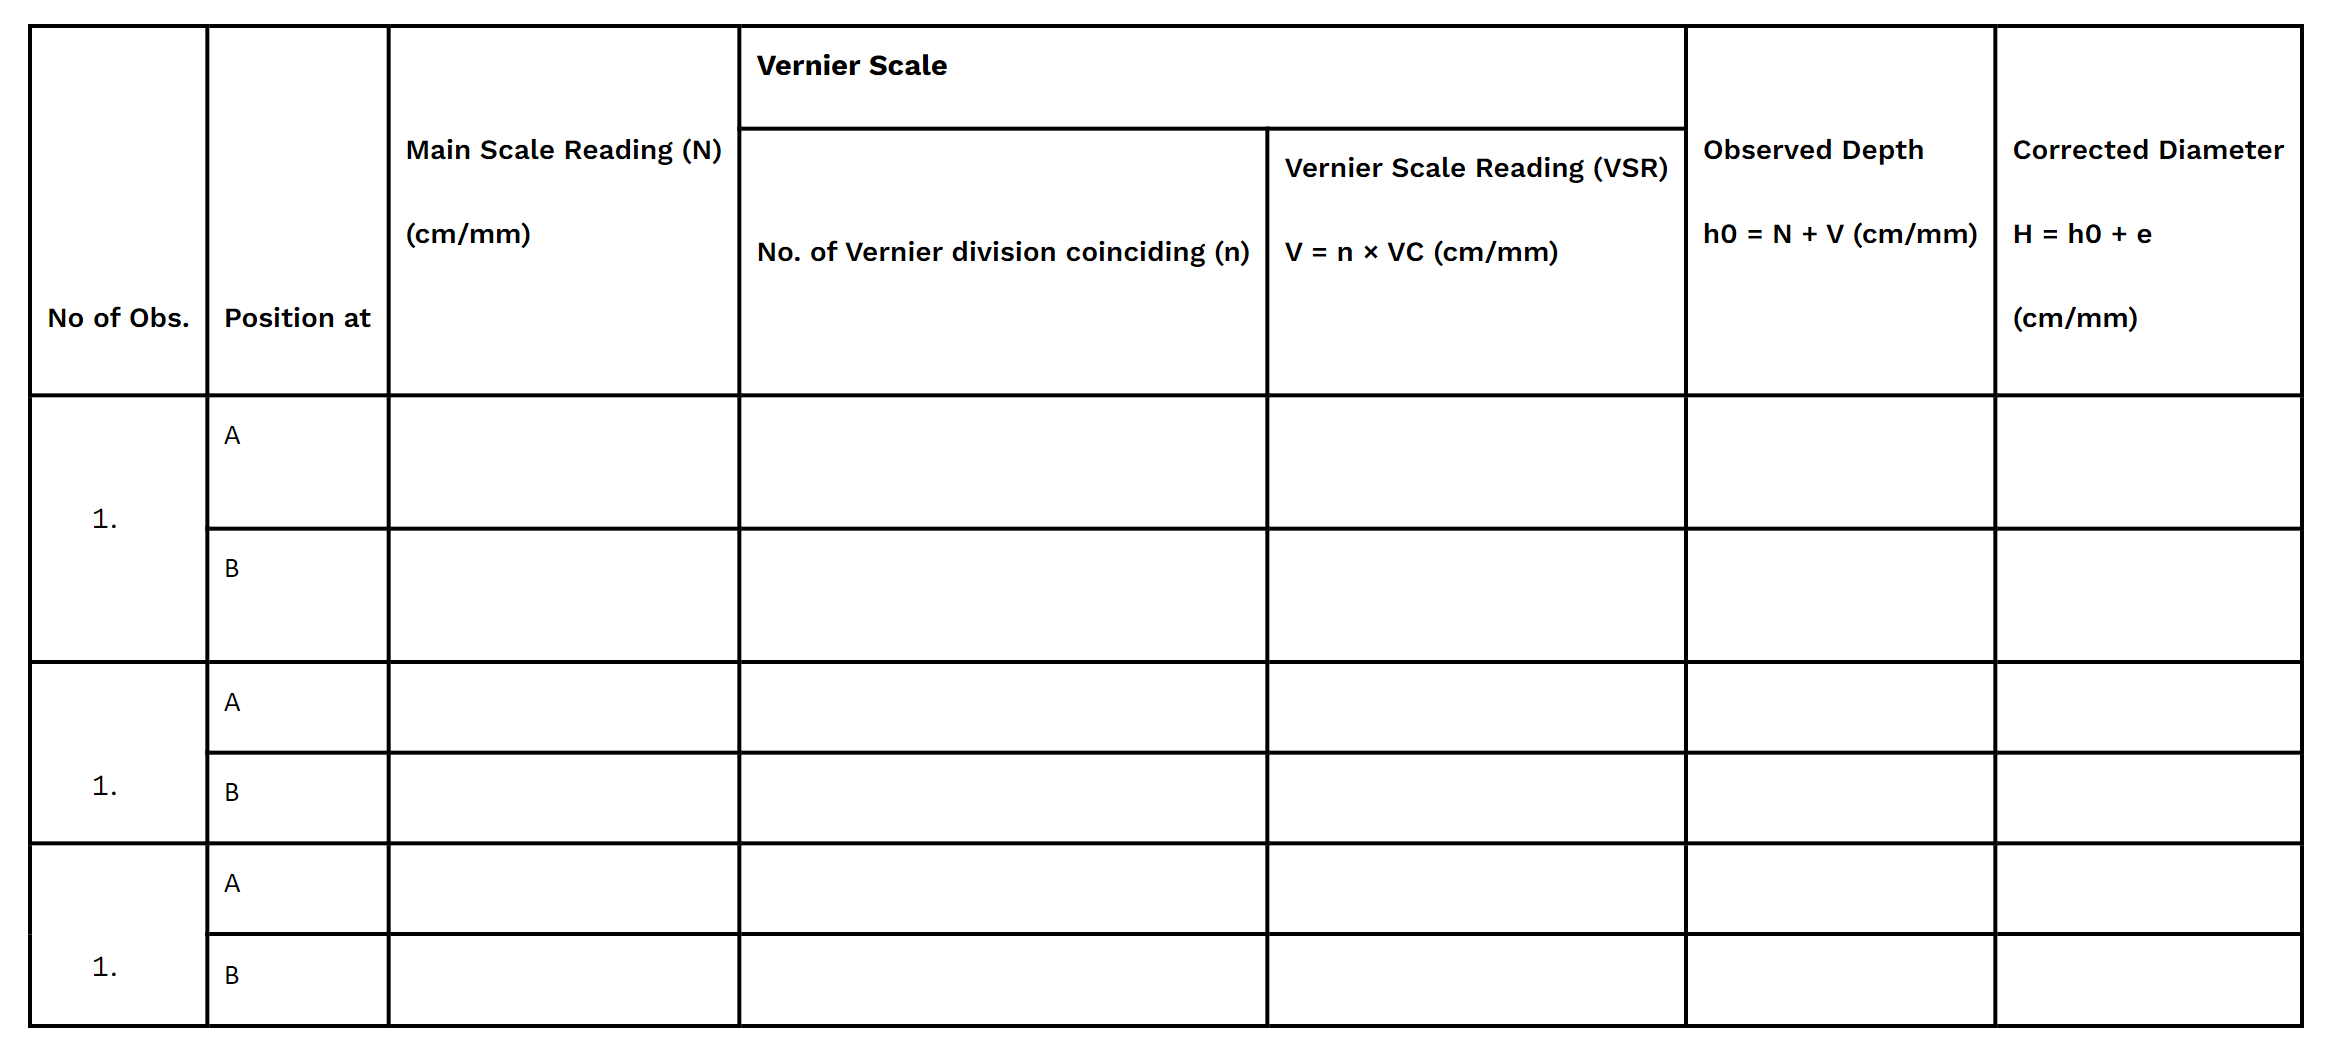
[(a) and (b) corresponds to mutually perpendicular diameters.]
Mean corrected depth, h: __________________(cm/mm)
Calculation:
Diameter of the sphere, Ds = ………………………………cm
Radius of the sphere, rs = = _____________cm
Internal diameter of beaker, DB = ………………………..cm
Radius of beaker, rb = = ________cm
Depth of beaker, h =…………………………………… cm
Volume of beaker or calorimeter, VB = cm3 = ………………………………….cm3
Volume of spherical object, Vs = cm3= ………………………………..cm3
Precautions :
Sources of error:
Reference:
you can download our vernier caliper lab manual .pdf DOWNLOAD NOW
Labkafe is among the most promising laboratory supplies vendors in India. We manufacture and supply lab equipment, lab furniture, lab consumables, lab glassware, lab machines and more! Not only we manufacture lab items, we export to international resellers too. We fulfill CBSE ICSE ISC IGCSE IB State board affiliation requirements for schools by providing affiliation packages to schools. Our featured products are:
Chosen by over 1200 schools, colleges, universities, research labs, government agencies and private companies to build or renovate their laboratories, Labkafe stands as your best friend when it comes to labs. We are also a registered OEM on GeM. Our clients love us because we provide the best quality of lab products, free demos, free installation, and support for ever.
Do you wish to experience excellence too? Why not contact us today at [email protected], or call 9147163562 directly ‒ we are always available to serve. You can also use the chat button in the corner to connect to one of our representatives instantly!
Feb 16, 2023 by Biswajit Sana
Jun 03, 2022 by Swarna Karmakar