Aim:
(a) To find the least count of Vernier calipers
(b) To measure the diameter of a small spherical/cylindrical body
(c) To measure internal diameter and depth of given beaker using Vernier Calipers and (d) hence find its volume
Apparatus:
- Vernier Calipers
- Cylinder (Metal)
- Beaker (Graduated)
Theory:
A Vernier Caliper has two scales–one main scale and a Vernier scale. The Vernier Scale slides along the main scale. Generally, each division of the Vernier scale is smaller than each division of main scale. In our example, nine main scale divisions are equal to ten Vernier scale divisions.
The main scale is graduated in cm and mm. It has two fixed jaws, A and C, projected at right angles to the scale. The sliding Vernier scale has jaws (B, D) projected at right angles to it and a metallic strip (N). The zero mark on the main scale and the Vernier scale coincide with each other when the jaws touch. Moreover, the jaws (A, B) are used to measure the external diameter of an object while jaws (C, D) are used to measure the internal diameter of an object.
The metallic strip (N) is designed to measure the height / depth of objects. Knob P is used to slide the Vernier scale on the main scale. Screw S is used to fix the Vernier scale at a desired position. The least count of a common meter scale is 0.1 cm or 1 mm. It is difficult to decrease the least count further, as then the graduations would be difficult to see. A Vernier scale enables more precise measurement, as here two different scales are used for measurement.
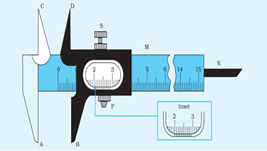
Fig. 1.1
Determination of Least Count of Vernier Calipers or Vernier Constant:
The difference in the magnitude of one main scale division (M.S.D.) and one Vernier scale division (V.S.D.) is called the least count of vernier Calipers. This is the smallest distance that can be measured using the instrument. The Least Count (LC) is also called the Vernier Constant (VC).
In Fig. 1.1, 10 divisions on the Vernier scale coincide with 9 divisions on the main scale and the length of 1 division on the main scale is 1 mm.
10 Vernier Scale Divisions (VSD) = 9 Main Scale Divisions (MSD)
1 VSD = 0.9 MSD
The quantity (1 MSD – 1 VSD) is called the Vernier Constant (VC).
VC = 1 MSD – 1 VSD = 1 mm – 0.9 mm
Hence, VC = 0.1mm = 0.01cm
The volume of the spherical object is:
V = (4/3)πr 3, where r is the radius of the sphere.
Determination of Zero Error:
If the zero mark on the main scale coincides with the zero mark on the Vernier scale when jaws C and D are brought in contact with each other, then the instrument is free from zero error as shown in fig. 1.2. However, it is never so. Because of wear and tear of the jaws or due to manufacturing defects, the zero mark on the Vernier scale does not coincide with the zero mark on the main scale. This gives rise to zero error. Zero error can be positive or negative.

Fig. 1.2
(i) Positive zero error and its correction:
The zero error is positive when the zero mark on the Vernier scale shifts towards the right side of the zero mark on the main scale when jaws C and D touch each other. In this case, the measured length will be more than the actual length and, therefore, the zero error is called positive zero error. Hence, we have to subtract the positive error from the obtained reading. If, for example, the 3rd Vernier mark coincides with any main scale mark as shown in Fig 1.3, then the Zero error is:
Zero error = 0.00 + 3 x Least Count = 0.00 + 3 x 0.01 cm
Zero error = 0.03 cm
Hence, the actual reading = Measured reading – (0.03) cm

Fig. 1.3
(ii) Negative zero error and its correction:
The zero error is negative when the zero mark on the Vernier scale shifts towards the left side of the zero mark on the main scale when jaws C and D touch each other. In this case, the measured length will be less than the actual length and, therefore, the zero error is called negative zero error. Hence, we have to add negative error with the obtained reading. If, for example, the 8th Vernier mark coincides with a main scale mark as shown in Fig 1.4, then the Zero error is:
Zero error = 0.00 – (10-8) ** x Least Count = 0.00 – 2 x 0.01
** To calculate the negative zero error, we subtract the mark on the vernier scale that coincides with any mark on the main scale, from 10, before multiplying it with the least count.
Zero error = -0.02 cm
Hence, the actual reading = Measured reading – (-0.02)

Fig. 1.4
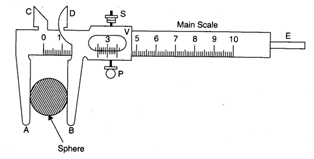
Fig. 1.5
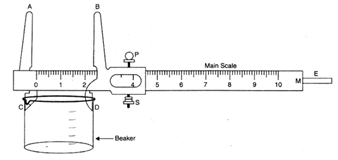
Fig. 1.6
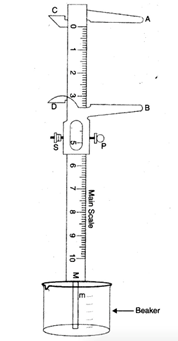
Fig. 1.7
Procedure:
- Determine the Vernier constant (V.C.) i.e., least count of Vernier calipers as explained above and record it.
- Bring the movable jaw BD in close contact with the fixed jaw AC and find the zero error. Do it three times and record it. If there is no zero error, then record zero error as Nil. If it does not coincide, then find the zero error and record it.
Diameter of spherical body
- With the help of lower jaws (A, B) grip the spherical body gently without exerting excess pressure, as shown in Fig. 1.5. Tighten the screw S attached to the Vernier scale.
- Record the main scale reading (N) just before the zero mark of the Vernier scale in Table 1.1.
- Note the number (n) of the Vernier scale division which coincides with any division of the main scale.
- Repeat the steps given above after rotating the body by 90°. Measure the diameter in a direction perpendicular to the original direction.
- Take at least four observations along different directions and apply zero error correction.
- Take the mean of all recorded diameters.
Internal diameter of the beaker
- Put the jaws C and D inside the rim of the beaker and open them till each jaw touches the inner wall of the beaker, without any undue pressure on the walls as shown in fig. 1.6. Tighten the screw S attached to the Vernier scale gently.
- Note the-position of the zero mark of the Vernier scale on the main scale. Record the main scale reading just before the zero mark of the Vernier scale in Table 1.2. This reading is called main scale reading (M.S.R.).
- Note the number (n) of the Vernier scale division which coincides with any division of the main scale.
- Repeat the given steps after rotating the Vernier calipers by 90° to measure the internal diameter in a perpendicular direction.
- Find total reading and apply zero error correction.
Depth of the beaker
- Keep the edge of the main scale of the Vernier caliper on the peripheral edge of the object, as shown in Fig. 1.7.
- Keep sliding the moving jaw of the Vernier caliper until the end of the strip just touches the bottom of the beaker.
- Repeat the steps given above from four different positions along the circumference of the upper edge of the beaker.
- Find total reading and apply zero error correction in Table 1.3.
- Take mean of two different values of internal diameter and four different values of the depth.
- Calculate the volume by using the formula and show that in the results with proper units.
Observations:
Determination of Vernier constant:
1 small div. of the main scale (MSD) = ______mm or ______cm
_____ Vernier division (VSD) = _____MSD
1 VSD = ______ MSD = ______ mm or ______cm
So, VC = 1 MSD -1 VSD = _______ mm or _______cm
Zero error, e = ± _______mm or _______cm
Table 1.1 Measuring the diameter of spherical body
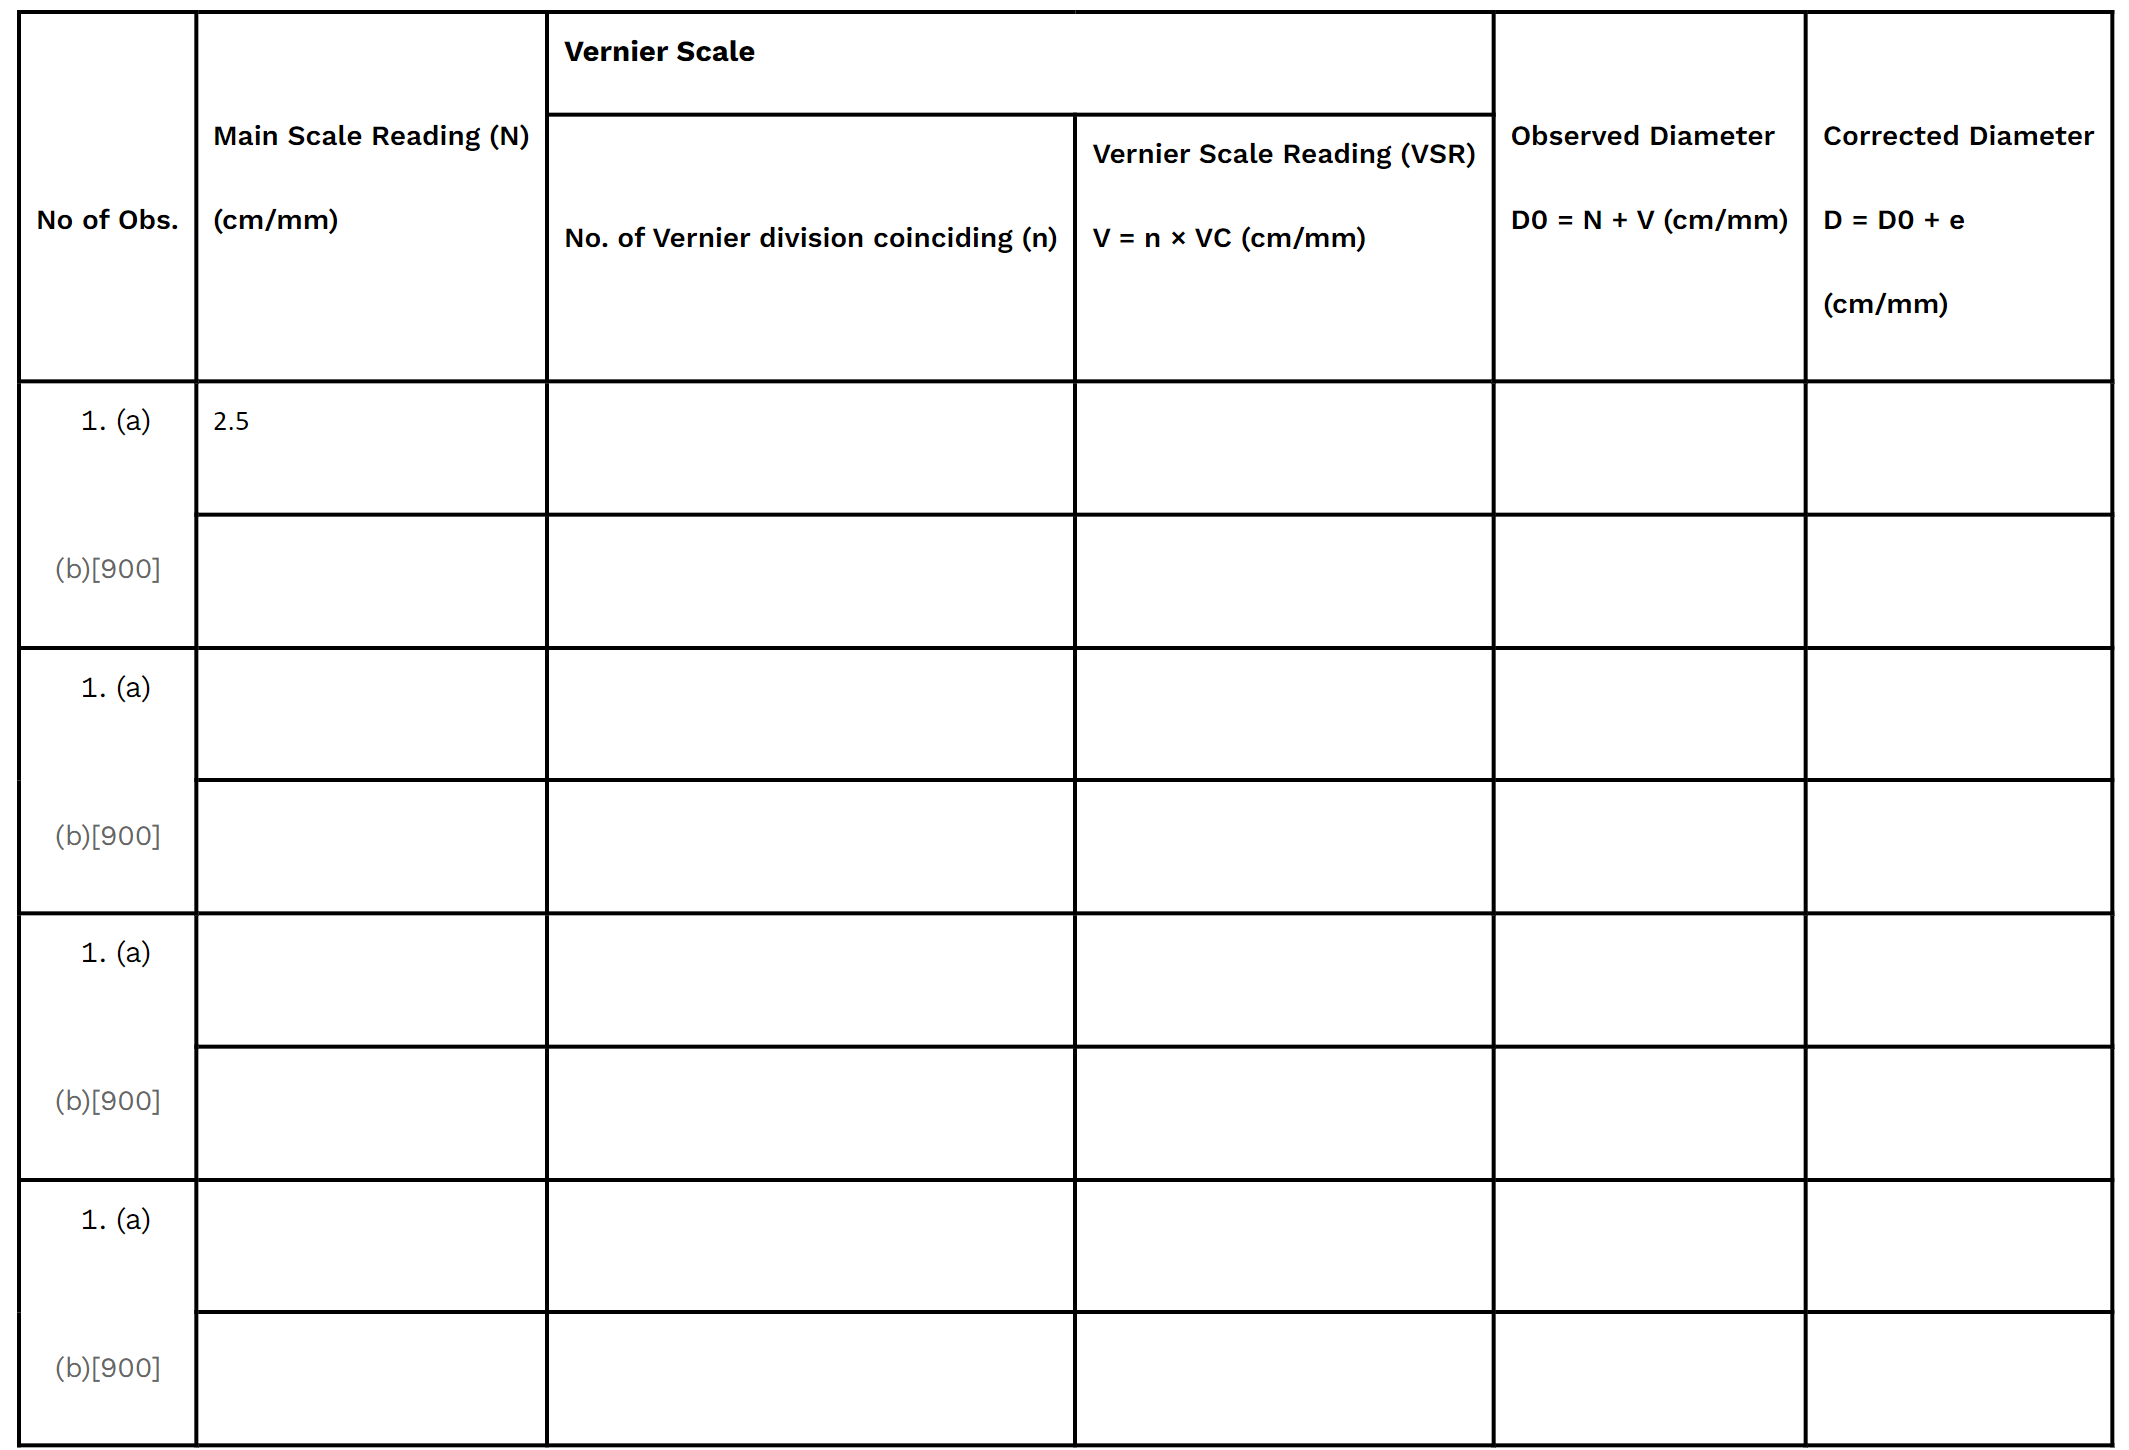
[(a) and (b) corresponds to mutually perpendicular diameters.]
Mean corrected diameter, D: __________________(cm/mm)
Table 1.2 Determination of internal diameter of a Beaker
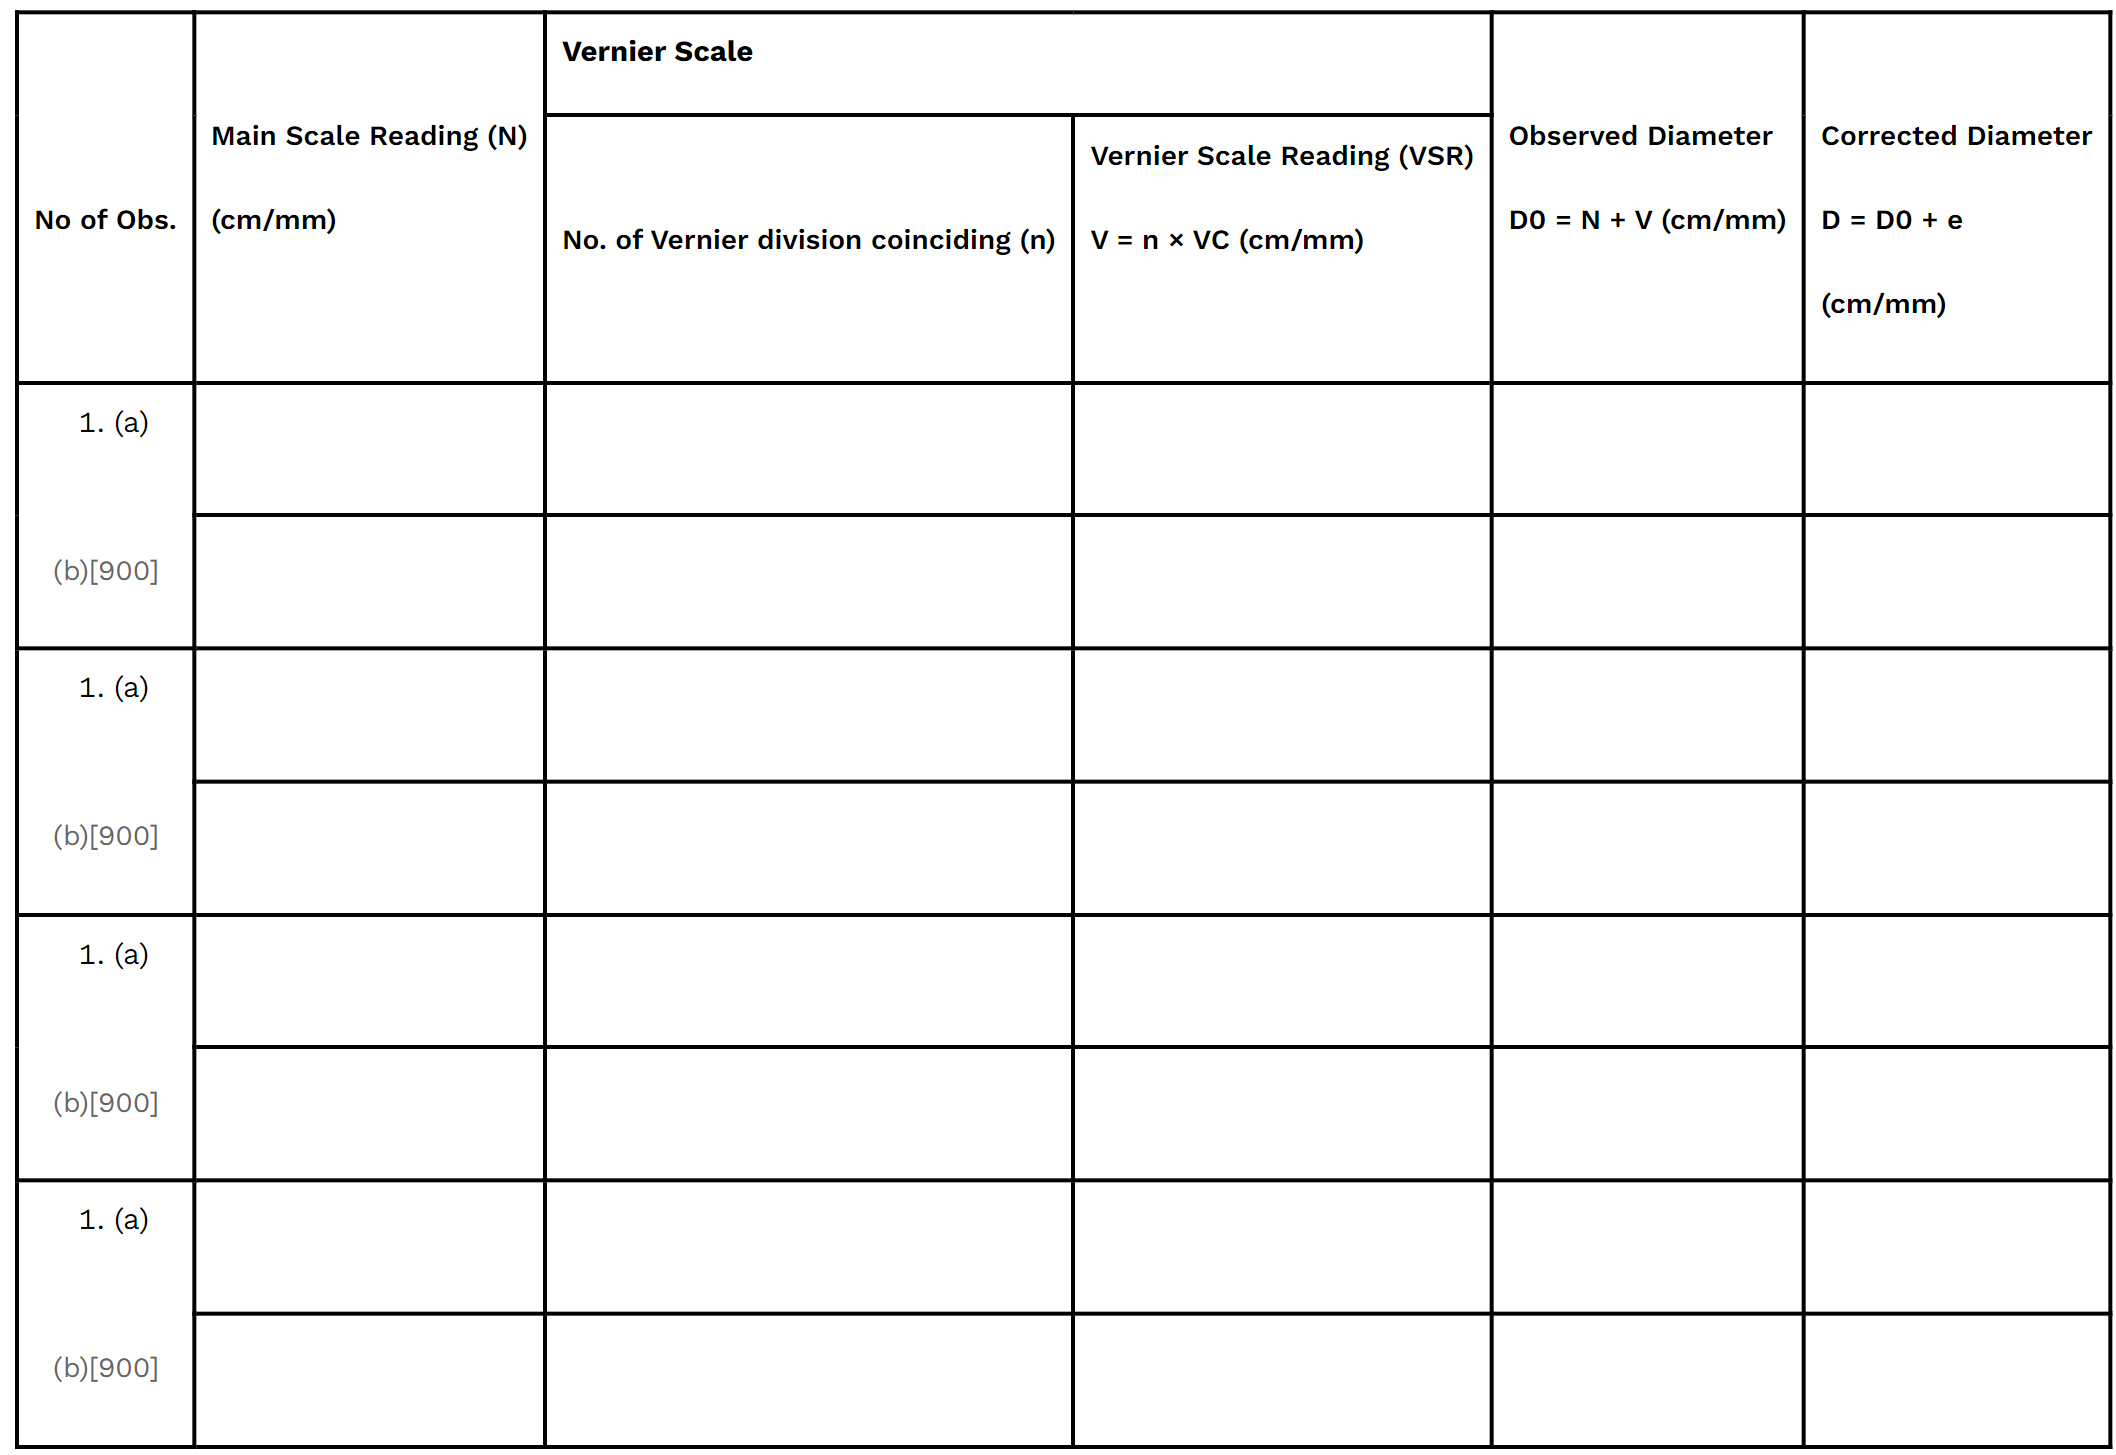
[(a) and (b) corresponds to mutually perpendicular diameters.]
Mean corrected diameter of beaker, D: _________________(cm/mm)
Table 1.2 Determination of depth a Beaker
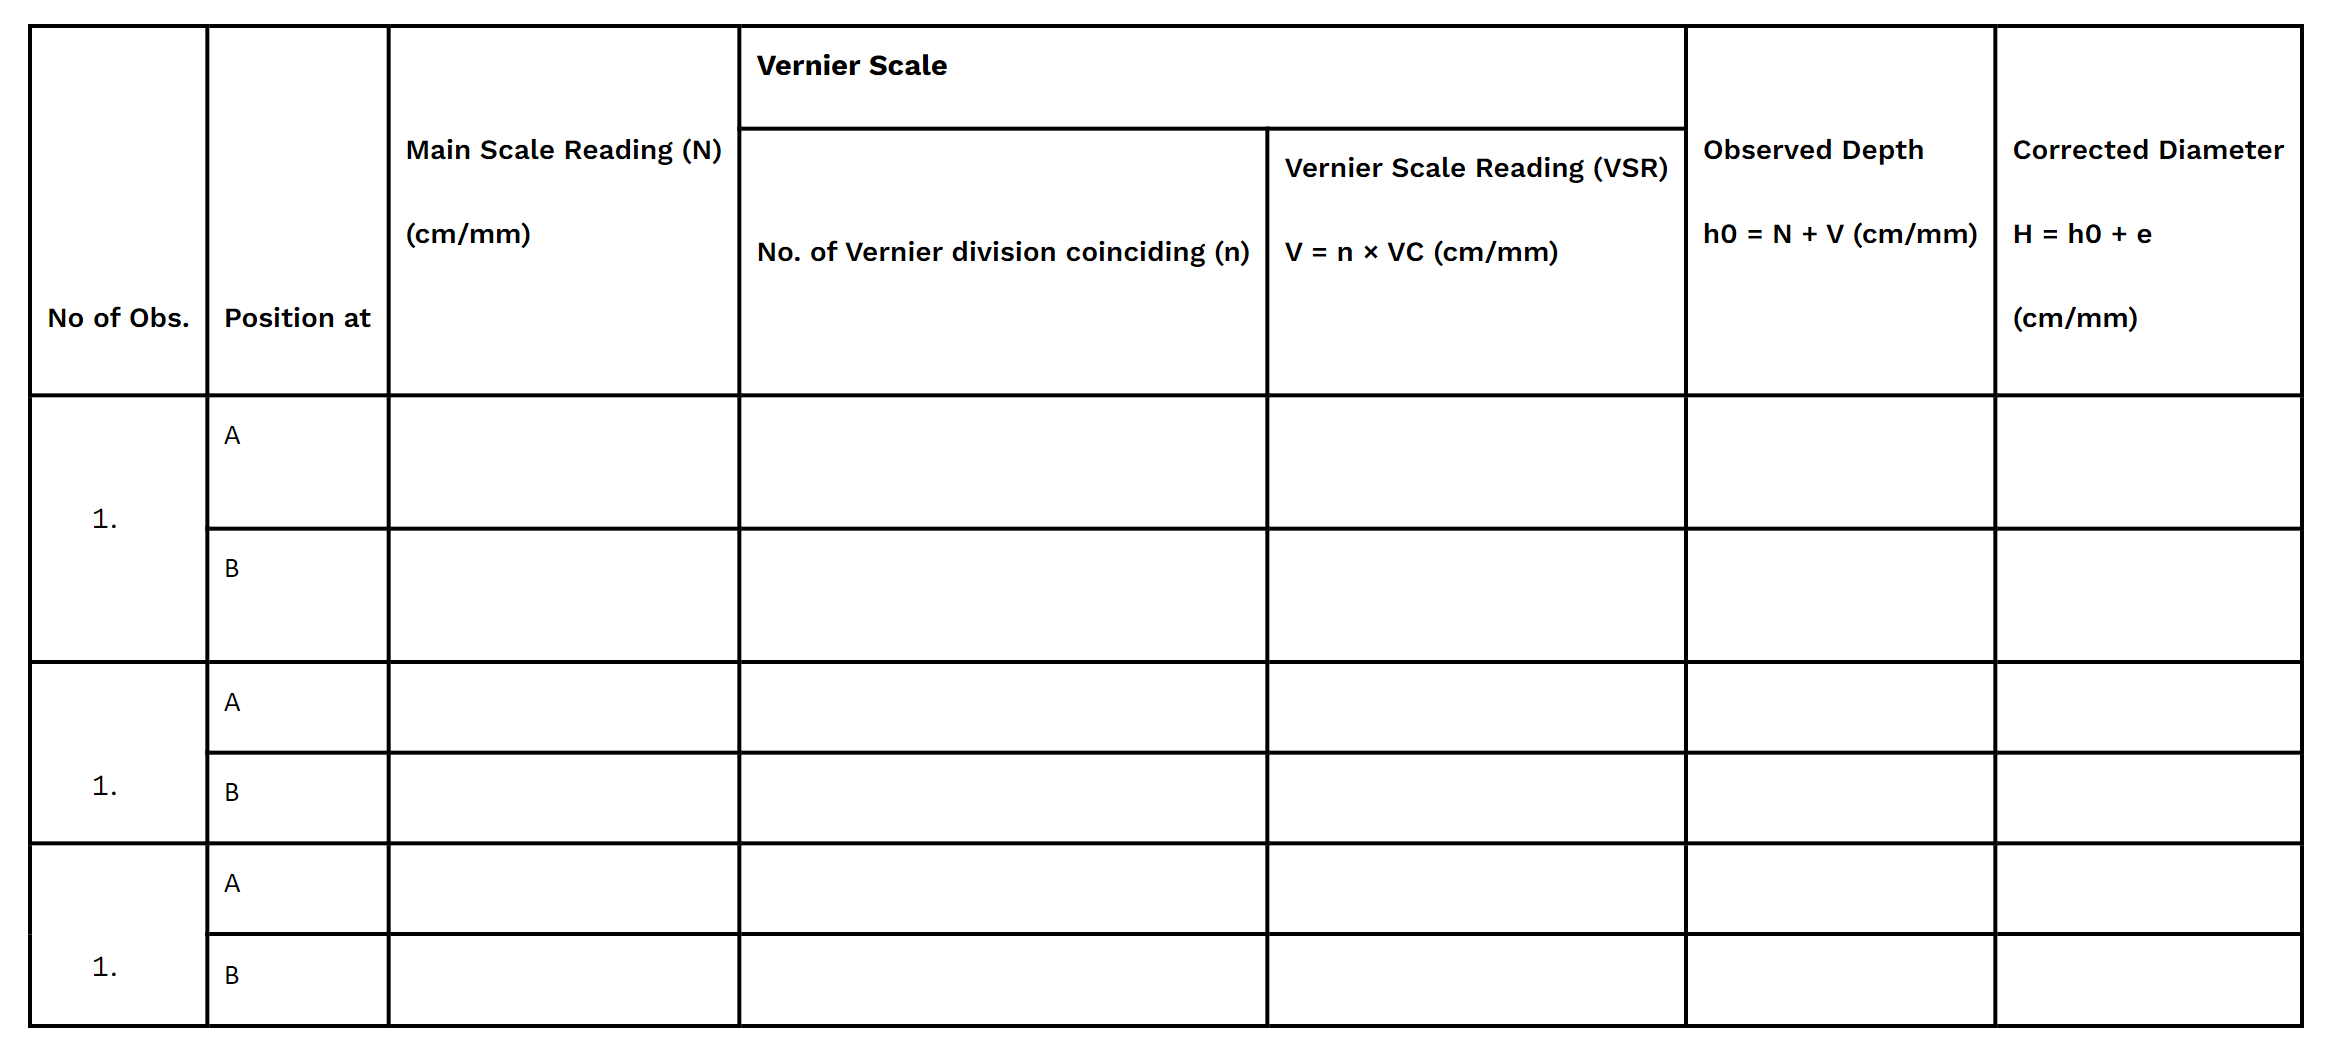
[(A) and (B) corresponds to mutually perpendicular depths.]
Mean corrected depth, h: __________________(cm/mm)
Calculations:
Diameter of the sphere, D = ………………………………cm
Radius of the sphere, r = _____________cm
Internal diameter of beaker, D = …………………………cm
Radius of beaker, r = ________cm
Depth of beaker, h =…………………………………… cm
Volume of beaker, V = ………………………………….cm3
Volume of spherical object, V = ……………………………….cm3
Precautions:
- If the motion of the Vernier scale over the main scale is not smooth, lubricate the instrument.
- Hold the experimental body firmly but gently between the two jaws of the calipers. Excess pressure may damage the body.
- Moreover, if the diameters measured at right angles to each other are found to differ greatly, reject both the values as the body is obviously not uniform along that plane.
- Remember, when taking the readings, the line of sight should be normal to the scale where the reading is being taken, in order to avoid parallax error.
Sources of error:
- The Vernier scale may be loose.
- The jaws may not be at right angle to the main scale.
- Parallax error might creep in while taking readings.
Reference:
Feel free to browse through our lab packages, including vernier calipers and physics practical kits.





Leave a Reply